Add a filter
The Filter menu ![]() contains a number of default options, such as all active students. You
can add your own options to this menu using queries or
snapshots
that have already been created.
contains a number of default options, such as all active students. You
can add your own options to this menu using queries or
snapshots
that have already been created.
To add a filter![]() a set of criteria to selectively screen out incoming information, such as "all active students" or "former students"
to the Filter menu:
a set of criteria to selectively screen out incoming information, such as "all active students" or "former students"
to the Filter menu:
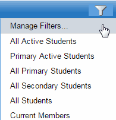
- Go to a list page, such as the Student List.
- In the upper-right
corner of the page, click the Filter
icon
 ,
and then select Manage Filters:
,
and then select Manage Filters: -
- The Manage Filters pop-up appears:
-
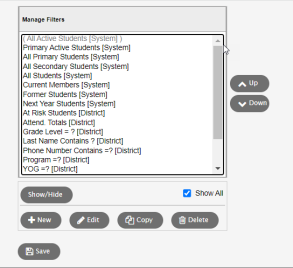
- To add a new filter, click New. The Filter Pick List appears:
-
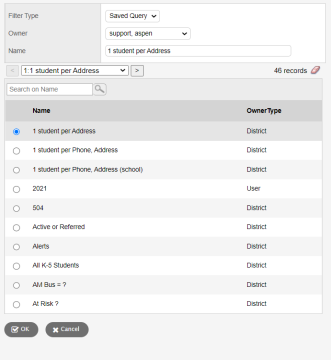
- Type a Name for the new filter.
- Click the Owner drop-down to select who will be given access to the filter.
- Click the Filter Type drop-down to select Saved Query or Snapshot.
- Select the query
 a request to find a group of records that match specific criteria at a particular time
or snapshot a static picture of a particular group of records that you can file and easily retrieve you want to add to your
Filter menu.
a request to find a group of records that match specific criteria at a particular time
or snapshot a static picture of a particular group of records that you can file and easily retrieve you want to add to your
Filter menu. - Click OK. Your query or snapshot is added to the bottom of the list of your filters:
- Click Close.
|
Note: Do not select All Records from your Filter menu if your next step will be to run a query. Instead, select All Records in the Search based on list on the Query window. Not only does this save a page refresh, it also prevents a potentially large list of records from being loaded unnecessarily. |